

Hi Crafty Friends and AECP Co-ordinators!
Now that I have successfully completed all ten classes for AECP Level 2, all that remained was to complete the Final Challenge which I finished yesterday! As there are two elements to this challenge I have split the challenge into two blog posts, one for the cards and one for the home decor project, to avoid having a super long post! This is the home decor project post, please click here to visit the card post.
The details for the Final Challenge are as follows:
- Select ANY 3 components from the classes in Level 1 or 2 (e.g., layering 1/2, Let it shine, stencil techniques)
- Explain the 3 components that you’ve chosen for the project
- Share design tips (if any)
- Please make 4 MASCULINE cards (Themes are; birthday, Love/Thinking of You, Anniversary, and Encouragement) + Altered Item/Upcycled Project.
- Challenge blog post: Detailed step-by-step photo tutorial and/or YouTube video
- Minimum of 10 photos (close-up and process)
- DUE DATE: Submit to the AECP gallery within one month (8/1)
- If you can come up with a new technique or new way to step up the challenge, that will be awesome! We would love to be impressed!
First Steps
I have been thinking about the final project since I was given my mission by email on June 30th and what I wanted to create for my altered/upcycled home decor project. My initial thought was to use an old IKEA shadow box frame, or going down a nature route, to use some branches from the garden. However, the answer came when I was clearing out an old desk drawer and came across some old CD-ROMs that contain obsolete software and are now basically useless for their intended purpose, but that doesn’t mean they can’t still be useful and even decorative!
Outline
Step 1 – Collect All Materials and Potential Materials
Step 2 – Stencil the CDs
Step 3 – Die Cutting
Step 4 – Stamping the Feathers
Step 5 – Wirework
Step 6 – Finishing Touches and Assembly
Step 7 – Design Tips
Step 1 – Collect All Materials and Potential Materials
Click thumbnails to see full size images…
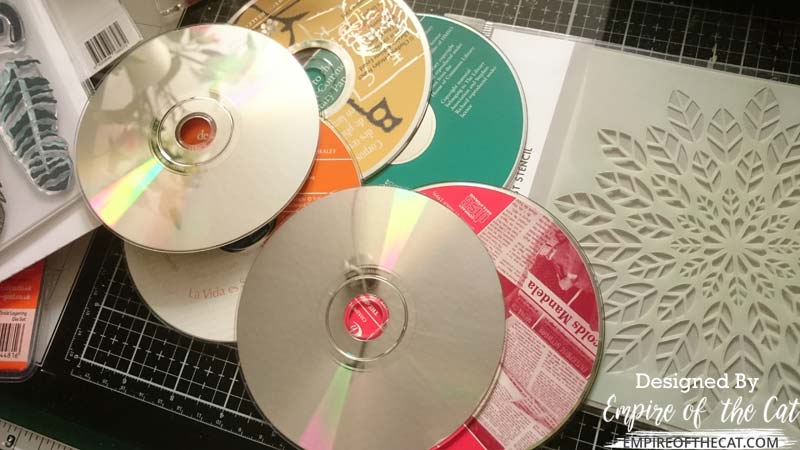
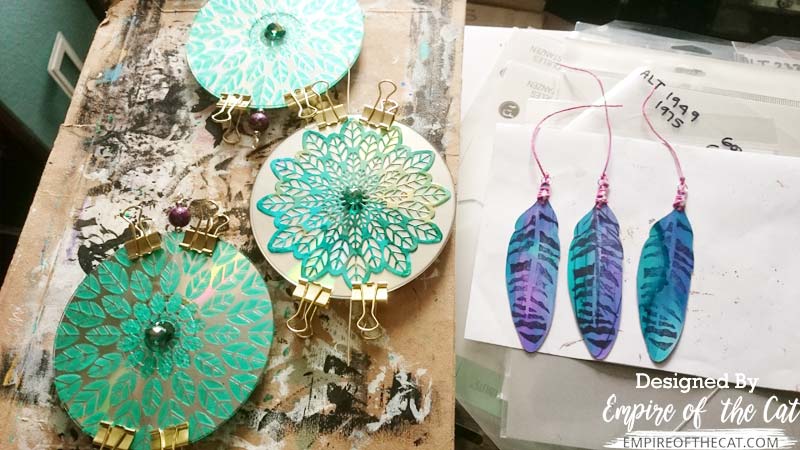
I have quite a few of these old CD-ROM discs and for this project I am going to use six of them – three for the front and then three for the back so that they are shiny on both sides. I could have just used three discs and painted the backs but I wanted the shine as I am making a suncatcher so the more shine the better!
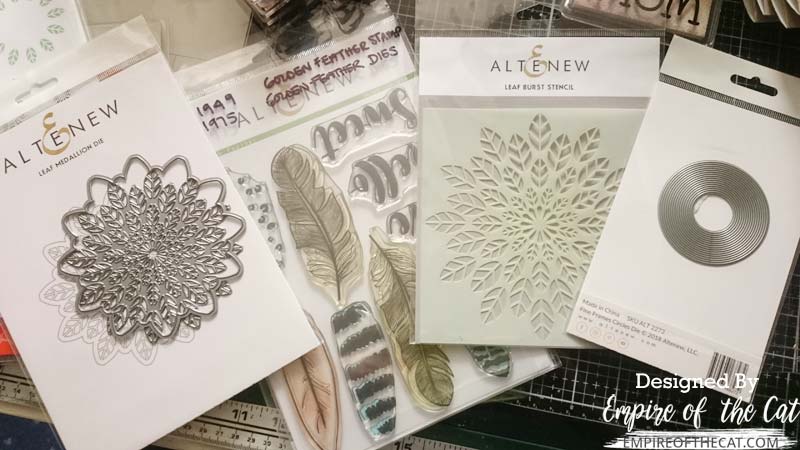 Still thinking about nature from the masculine card project, I pulled out some potential Altenew products to use on my project. I used everything you see in the photo above except the Fine Frames Circle dies on the right as I didn’t think they were needed in the end.
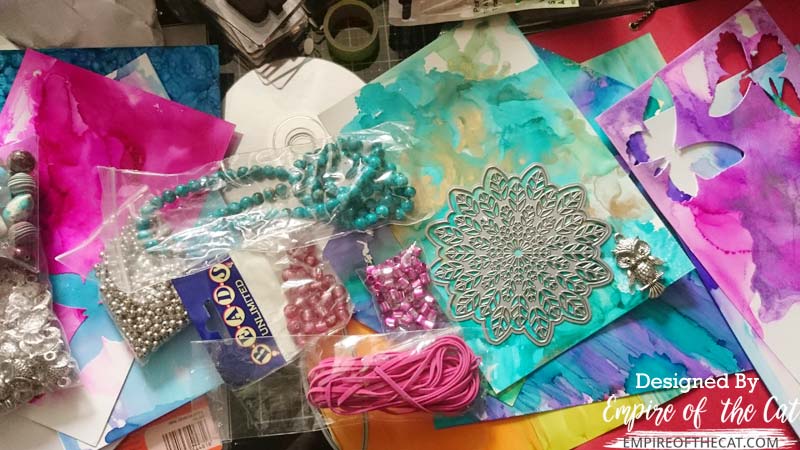 I also pulled together other items I might want to add to my project, mostly beads, stringing materials, other jewellery items and these alcohol inked backgrounds left over from other projects. All items are in the colour palette I wanted to use green, pink, purple.
Step 2 Stencil the CDs
Click thumbnails to see full size images…
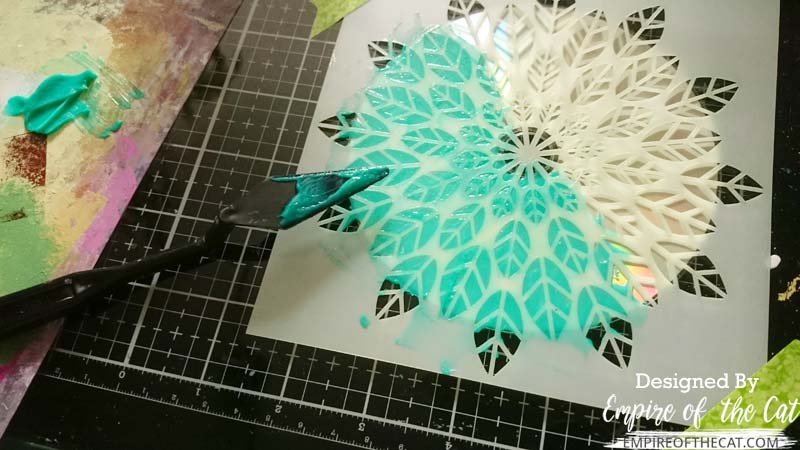
I wanted to stencil a design on to the shiny side of the CD-ROMs and so I taped my disc onto my glass mat, and then taped the Leaf Burst Stencil on top. The product I used for the stencilling is a new one from Izink called Ice and the colour was Bleu Ocean. The reason for using this product is because it said on the package that it was suitable for all surfaces so I decided to test it out and see if it would work on a CD. I applied the gel through the stencil using a palette knife, then carefully peeled off the stencil and set the CD aside to dry.

Here’s a closer look at the ICE gel once it has dried on the CD. It doesn’t take long to dry although you can speed it up using a heat tool, I didn’t want to use one on my CDs and I had plenty of time to let them dry naturally.
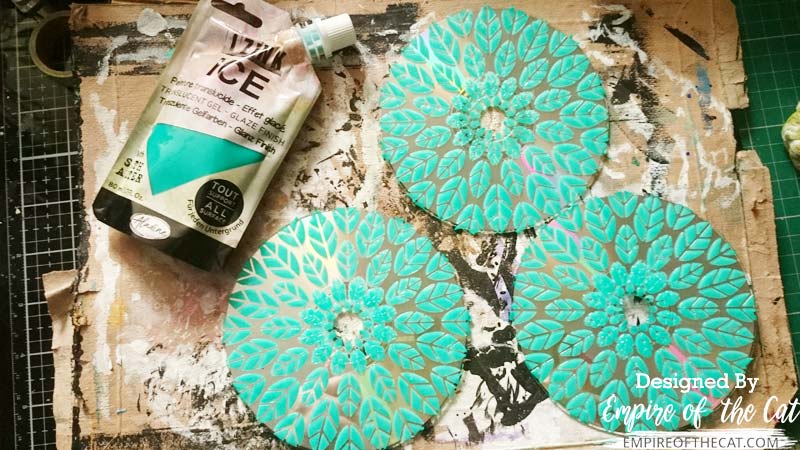
I repeated the process with two more CD-ROMs so that I had three of them stencilled with the Leaf Burst stencil though I only planned to use two, the third was a back up in case anything went wrong. My suncatcher would consist of three CDs but one of them would be different.
Step 3 – Die Cutting
Click thumbnails to see full size images…

I wanted to have a stencilled CD at the top and bottom and something different in the centre, so I decided to use one of the alcohol inked leftover pieces to die cut my centrepiece design. I also thought they might be good to use with the feather design too.
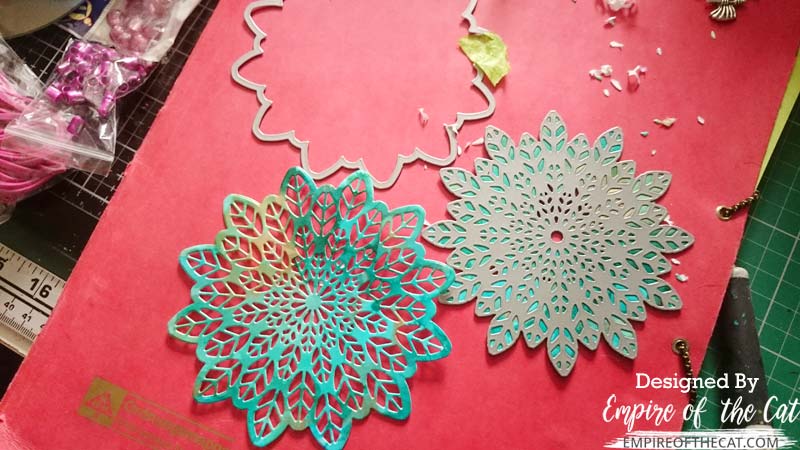
I used the Leaf Burst die to die cut my alcohol inked card. This was on glossy cardstock and so I had to run it through the Big Shot a few more times because it is such an intricate die and the glossy cardstock has an extra coating on it, plus all the alcohol ink.

Most of these little leftover pieces were stuck in my die and had to be poked out using a craft tool. I gathered them all together and saved them in a little container to be used in a shaker card later.
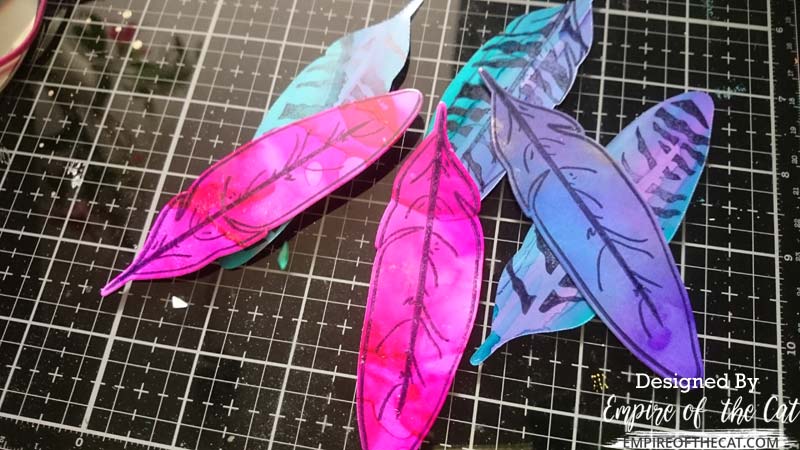
Step 4 – Stamping the Feathers
Click thumbnails to see full size images…

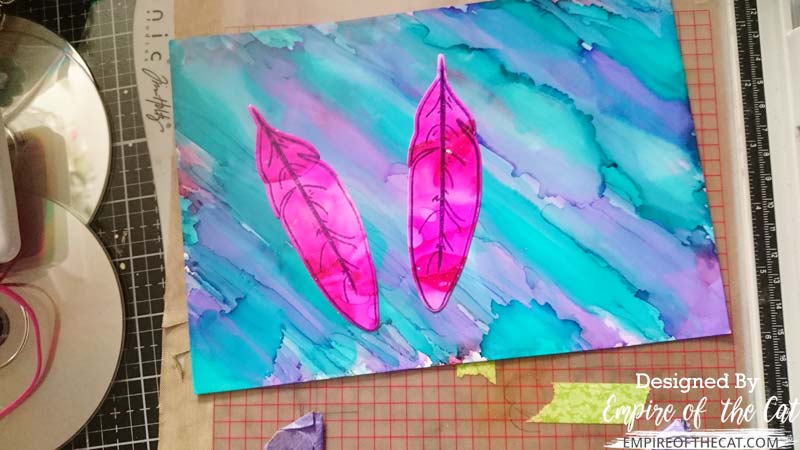
I used the Golden Feather stamp set to stamp out some feathers from the alcohol inked backgrounds. I really love this strong pink colour with the sea green on the CDs, and the varying colours within the pink. I used Black Archival ink to stamp as it stamps on most things and dries very quickly so less likely to smudge.
As these feathers would be seen from both sides, I needed something to go on the back. I used this striped alcohol background to cut out three feathers to use as backs for my two pink feathers and one purple feather.
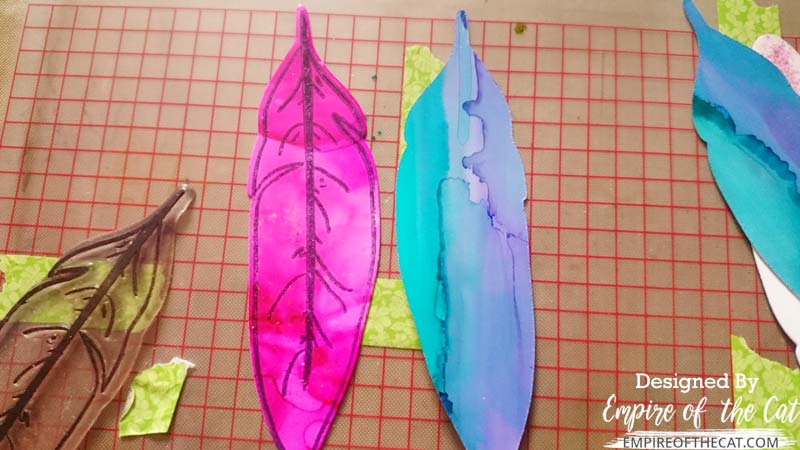
Important: as these feathers will be on the back of the pink and purple feathers, they need to be die cut coloured side down so that they will be a mirror image of the pink feathers and fit together correctly. The photo above shows what I mean, they are mirror images of each other.
Step 5 – Wirework
Click thumbnails to see full size images…
 I stamped the back pieces with a different stamp from the Golden Feather set as the feather quill stamp would not work on the mirror image feathers. Even with bending the stamp a little, the angle was still off, but I actually like the black stripes better for the back piece anyway so it worked out well. Above shows all six feather pieces to make into three double sided feathers.
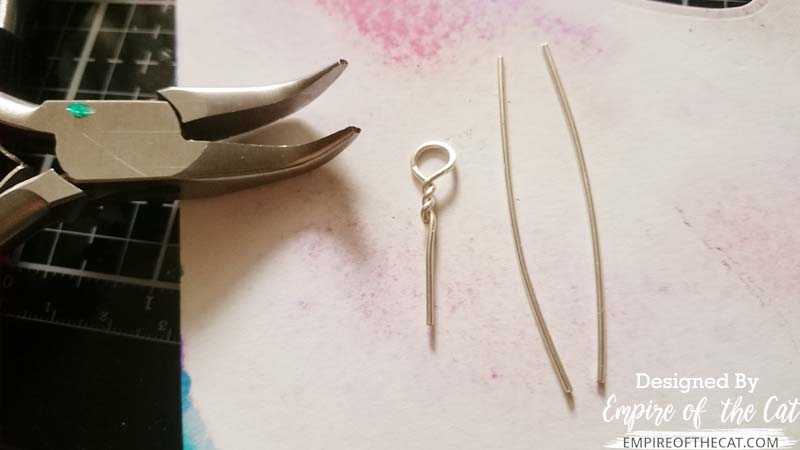 In order to complete my feathers and be able to easily attach them to the rest of my suncatcher, I cut 3 x 2 inch pieces of 18ga silver wire and used jewellery pliers to bend them into something like eye pins, just simple loops really, like the one shown above.
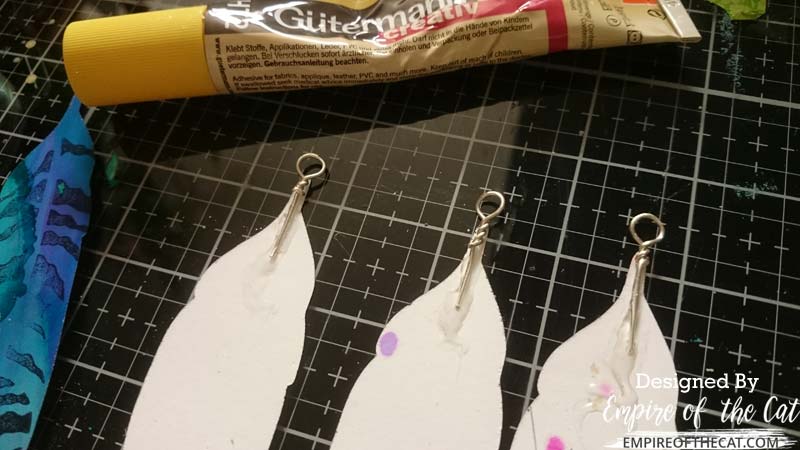 I glued the eye pins to the tops of each feather using this strong Gutermann HT2 glue and left them to dry which doesn’t take long.
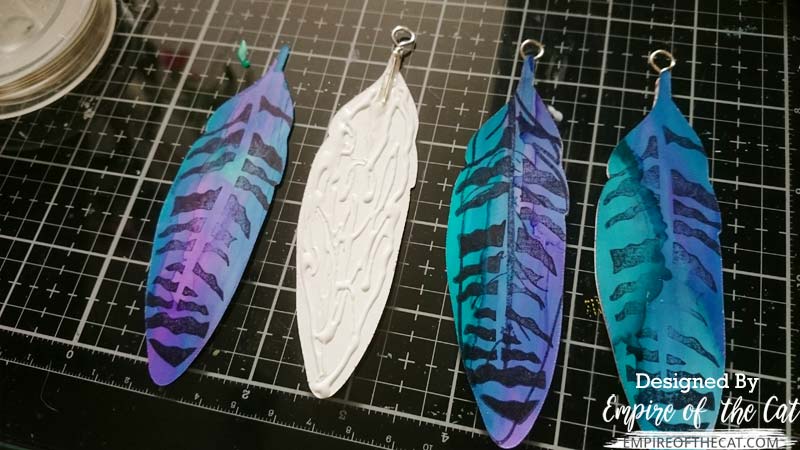 Once the eye pins were stuck and the glue was dry, I used Nuvo Deluxe Adhesive to glue the feather fronts and backs together. As they are made of cardboard, no special glue was needed, just regular white glue.
 I used the Gutermann HT2 glue to attach my die cut Leaf Burst to the CD though as I needed to make sure it would stay on securely.
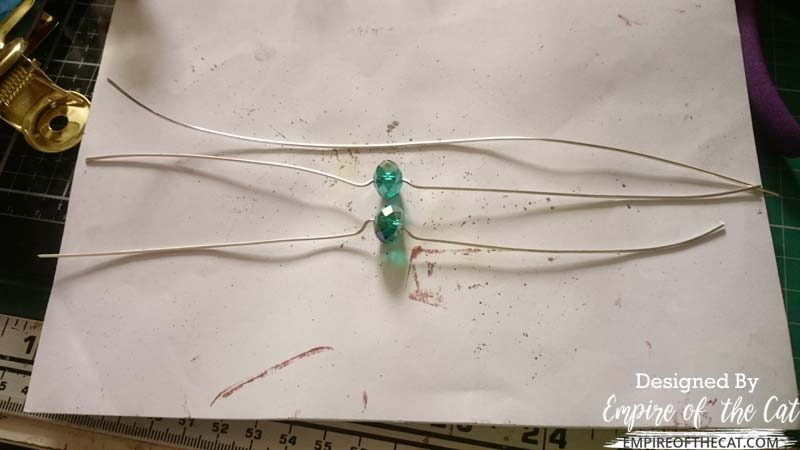 Next step was to make the connectors for each of the CDs. I wanted to use wire for this but anything could be used, thread, floss, ribbon, yarn etc. I cut three pieces of the same 18ga silver wire, each eight inches long. Because the CDs have holes in the middle, I wanted to fill that hole with a shiny bead so I used these green faceted rondelles for each of the CDs. To hold them in place in the middle of the holes, I bent the wire ever so slightly on either side of each bead to stop them moving around.
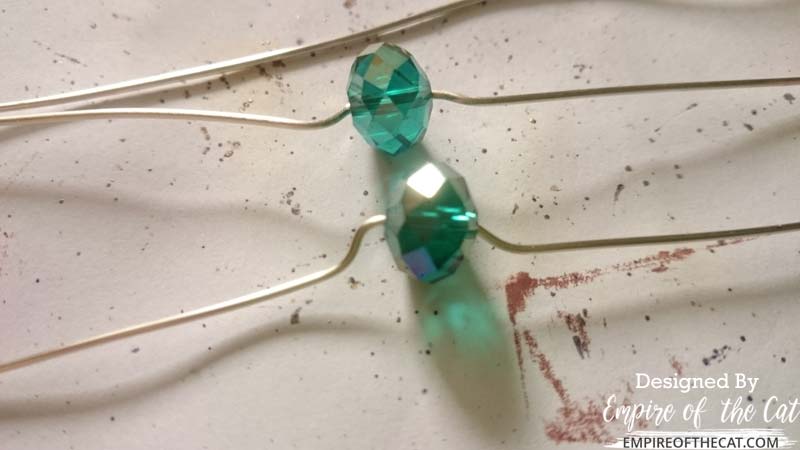 Here’s a closer look at what that looks like, it’s just a little kink in the wire that will hold the bead in place in the centre of the CD hole.
 To attach the wires, I taped them in place and then used the HT2 glue to glue the wires down. The photo above shows how the front and the back of a CD while this process is happening.
 Once the wires were glued in place, I added beads to each end of the wire that sticks out on either side of the CD, and finished them with a simple loop so they can be connected to each other.
Step 6 – Finishing Touches and Assembly
Click thumbnails to see full size images…
 This CD will be the top disc so I added a special green and gold bead to the top of that one, so that it will be different to the others.
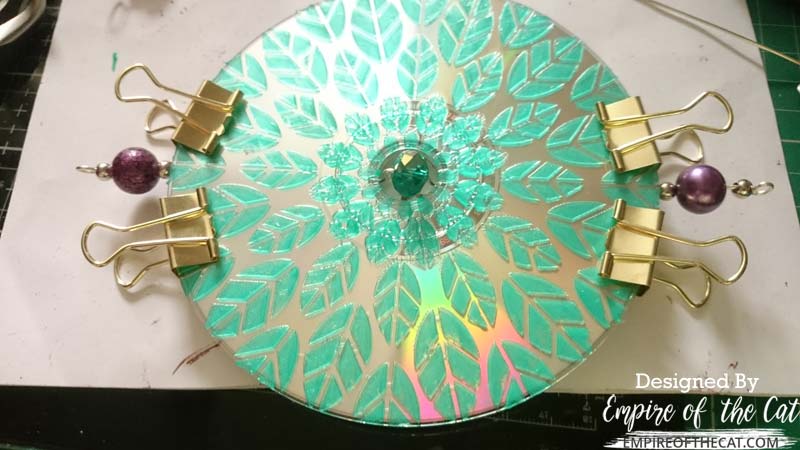 Now it was time to glue the un-decorated CDs to the backs of the decorated CDs, and I did this using the same strong HT2 glue and then held them in place with binder clips while they dried.
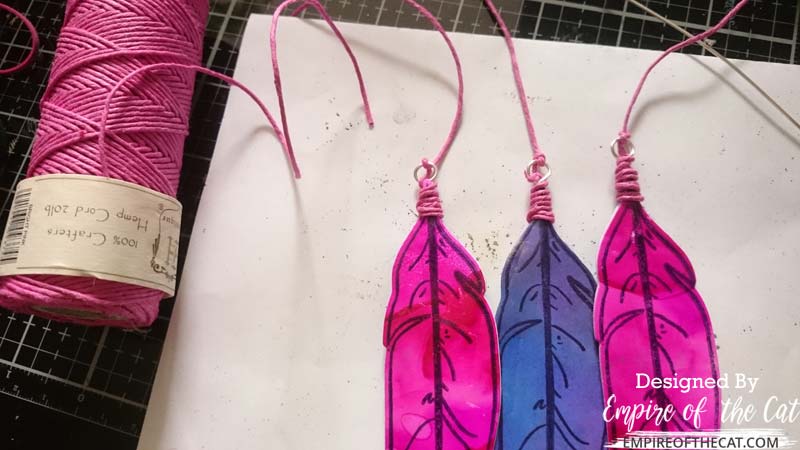 While my CDs were drying, I worked on my feathers, wrapping some pink hemp cord around the tops of them and tying them to the eye pin loops.
 Here are all my suncatcher components ready for assembly.
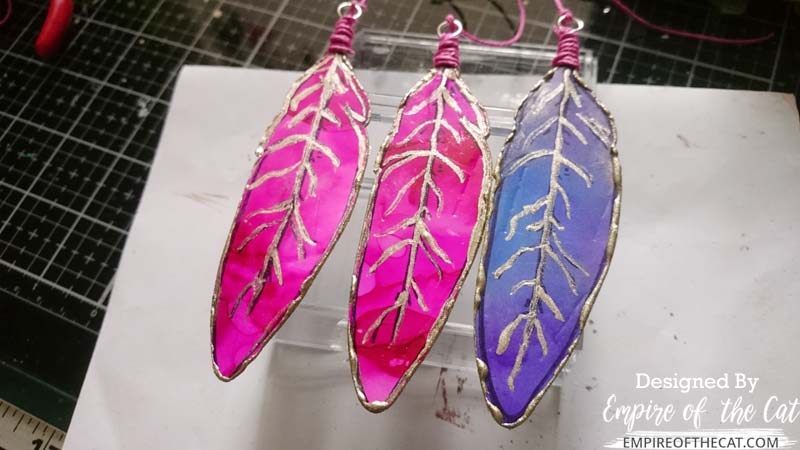 One more little detail was needed on my feathers. I painted on some of the feather veining using some gold metallic paint and then edged the feathers with the same paint.
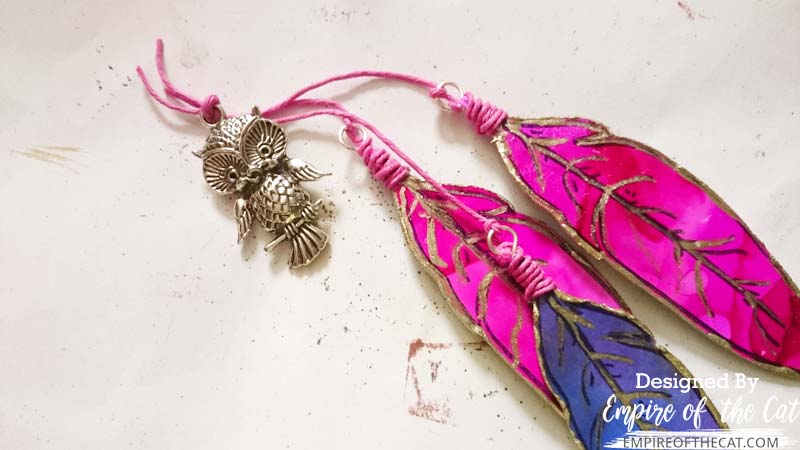 When the gold paint was dry, I tied the hemp cord on to this little metal owl charm which would then be attached to the bottom of my sun catcher. Everything was now ready to be attached, so it was just a matter of opening the eye pin loops and connecting them and closing them up again. I added a piece of pink faux suede cord to the top of the sun catcher so it could be hung up easily.
Step 7 – Share Design Tips
– Don’t be afraid to experiment with various mediums on the CDs. Heat embossing also works but you have to be careful not to warp the CD! Too much heat can also cause it to snap but it is doable with care.
– Think about ways to add texture to your project eg ribbon, wire, beads, twine, texture paste or gel, washi tape etc
– Consider using more recycled elements in your project or leftover scraps. Turn something bound for recycling or landfill, into something beautiful and/or useful.
– If you like this kind of project and working with wire, invest in some basic jewellery pliers to make life easier. The wire used here is 18ga which is really on the edge of being too thick to be bent by hand, or you could try lighter wire like 20ga+ but it may not be strong enough to hold your project
– If you don’t want to use wire, you could try embroidery floss, thread, yarn, string, twine, baker’s twine, hemp cord, rat tail etc
– Try different stencil for different effects, I like this one since it is a design with a centre point so it works well with a round base but something more random could look good too – experiment!
– When die cutting intricate dies, you might need to run it through the machine 3-4 times or add a shim for extra pressure. I use a piece of old cardboard
And my upcycled suncatcher project was complete. Click any of the images to see full size


Project Slideshow – Finished Sun Catcher
Catch the sun while you can
Upcycled Home Decor Sun Catcher Project
old CD-ROMs, with jewellery components, stencilling, die cuts and a lot of shine!
Final Thoughts
I really enjoyed the challenge to alter or upcycle something and I loved my finished project. I recycle and upcycle as much as possible, especially for the last few months when the recycling centres have been closed due to COVID-19. I have a huge stash of craft materials and so I really am making an effort to use more of the stash in an attempt to create more space in my house! I spent a day making the suncatcher, editing the photos and writing the blog post.
I think this is a relatively easy project that anyone could attempt and/or adapt, and there are bound to be old CDs lying around somewhere, whether they are music CDs or database CD-ROMs like the ones I used. The possibilities are limitless for stamp, stencil and die options as well as for decoration and construction.
I hope you like my upcycled CD project, let me know in the comments below!

>>>This is Part 2 Home Decor Project, please click to visit Part 1 Card Project<<<
PROJECT RECIPE:
Altenew – Leaf Burst Stencil, Leaf Burst Dies, Golden Feather stamps and dies
Aladine – Izink ICE Sea Green
Tonic – Nuvo Deluxe Adhesive
Gutermann – HT2 glue
Archival Ink – Jet Black
Prima – Finnabair Unicorn Hair metallic paint
From stash: old CD-ROMs, palette knife, alcohol ink background scraps, 18ga Silver wire, various beads, hemp cord, faux suede cord, jewellery pliers, Owl charm,
FYI – all my Class posts for Level 2:
.Beyond Basic Backgrounds
.In the Mood for Color
.With A Twist
.Creative Watercolor Media
.Polychromatic
.Beautiful Details
.Color Your Day
.Impressive Heat Embossing
.Magical Marker Techniques
.Masking Unleashed


This is absolutely brilliant!! I love it so much, from the texture to the colour to the idea and its execution!! Bravo!
Thank you for entering your work to the AECP assignment gallery.