

Hi crafty friends,
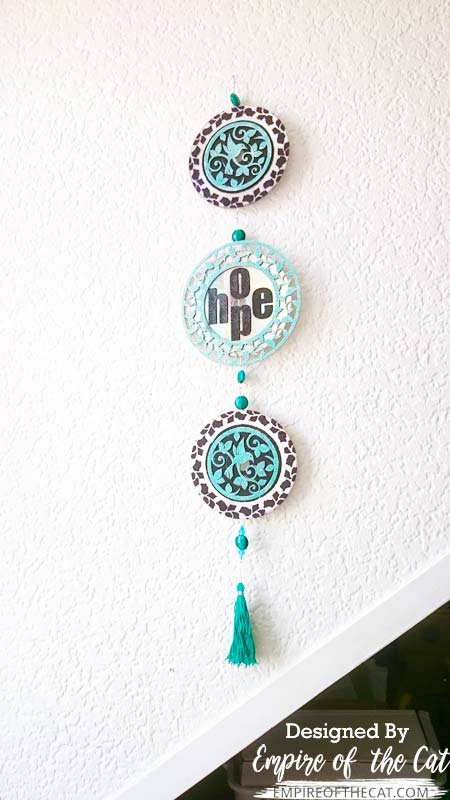
Hope you are well and enjoying any sunshine that might come your way this month. I say that as we have had a lot of rain and I have come to realise that July has become quite a wet summer month for the last few years. Never the less, I decided to make a suncatcher to perhaps entice the sun to pop its head out and shine on my little suncatcher.
Inspiration
My inspiration came from these old CD-ROMs that I found in a desk drawer during a recent clear out. They are obsolete and no longer work on any computer that I have so what to do with them? Well how about this?
GSL Products Used
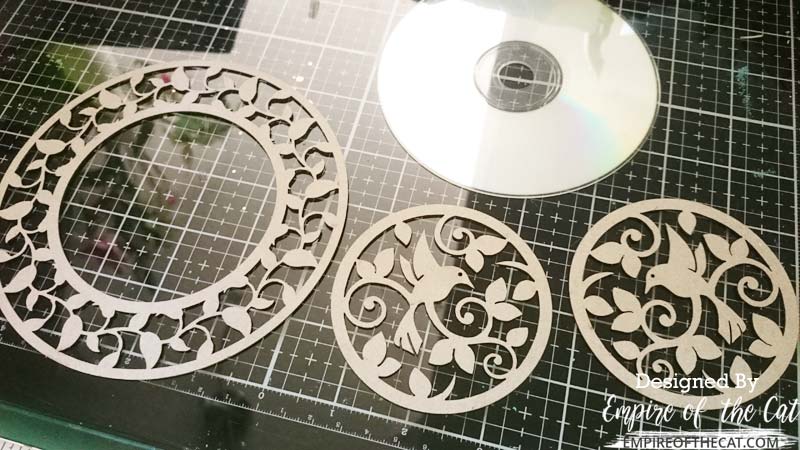
I used the Leafy Circle Frame D118A and the Hummingbird Medallion D117M in this project
Overview of Process
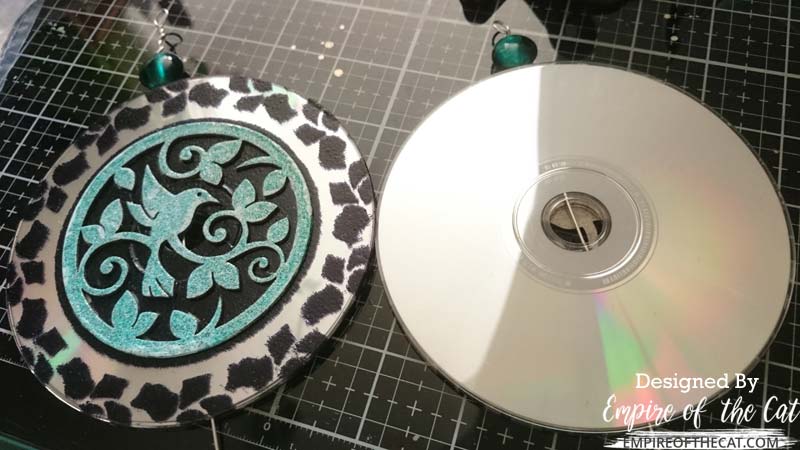
I was actually working on something else when I spotted the old CD-ROMs sitting on my table and my brain went off in a different direction, so after trying to fit them into the project I had already started, I decided to start over from scratch and make something else. I have these chipboards from GSL; on the left is the leafy circle frame and on the right is the hummingbird medallion, which had two in the pack. So I was looking at my CD and these chippies and trying to decide where to go next.
My first thought was pretty obvious, just add both to the CD since the medallion conveniently fits inside the circle frame. But I have quite a few of these old CD-ROMs so I wanted to find a way of getting more out of what I had and maybe even make a much bigger project than planned.
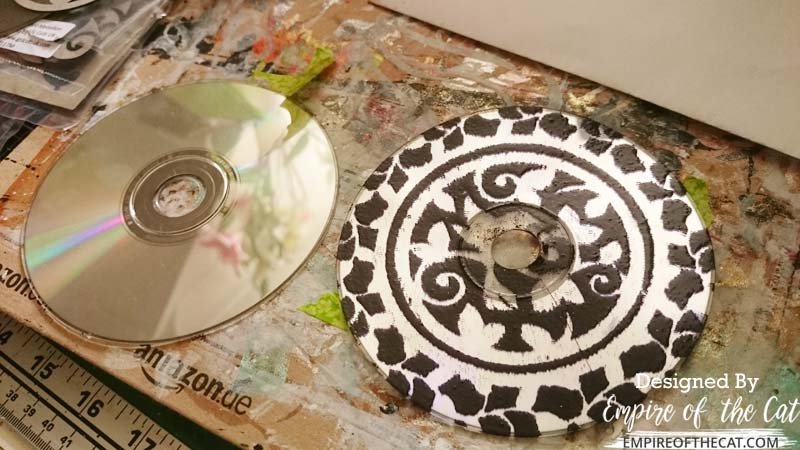
I thought that maybe I could use the chipboards as stencils and spray something through them like ink or paint, but I didn’t actually have anything that would adhere to the shiny CD and I didn’t want to cover them up with anything since the whole point was to have the shine. Thinking cap back on, I realised that I could try something else. so I taped the CD to the work surface and taped the chipboards on top, then got to work with some experiementing.
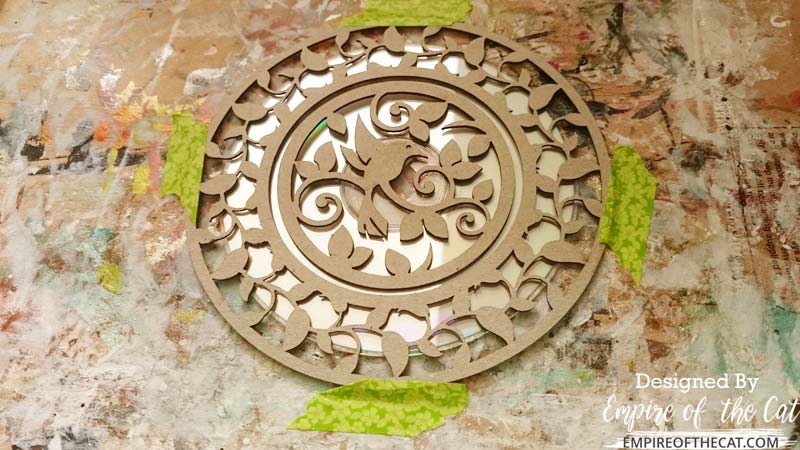
I used a stippling brush with some embossing ink to stipple through the chipboard “stencils” and when I removed them, I was left with this pattern in the sticky ink.

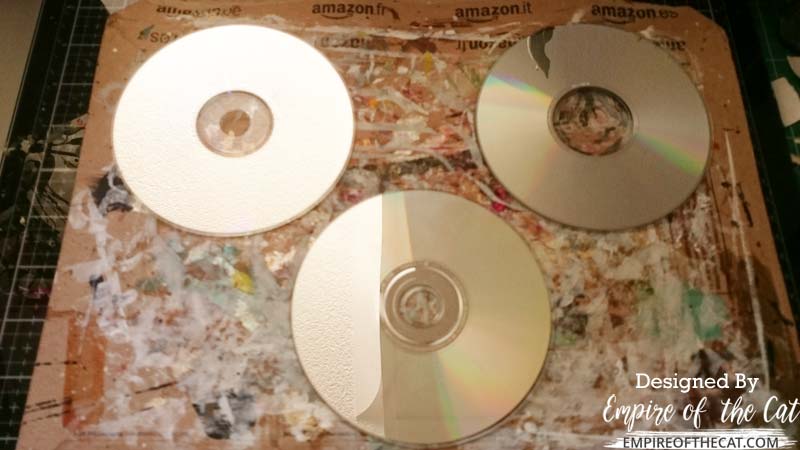
I then applied the Black Glint embossing powder and very carefully melted it with my heat gun. A word of warning here, CDs are made out of plastic, and can melt when heat is applied, so don’t be too aggressive with the heat gun and keep it moving over the surface of the CD to stop it warping. I have a Black and Decker heat gun that is intended for DIY not crafts, and I kept it on the low setting. Nothing warped but I did manage to crack one of the CDs afterwards! You can see it on the right in the photo below.
I laid all three CDs out on my table to see how they looked together before I glued anything down. Here’s a look at where we are now in the process…

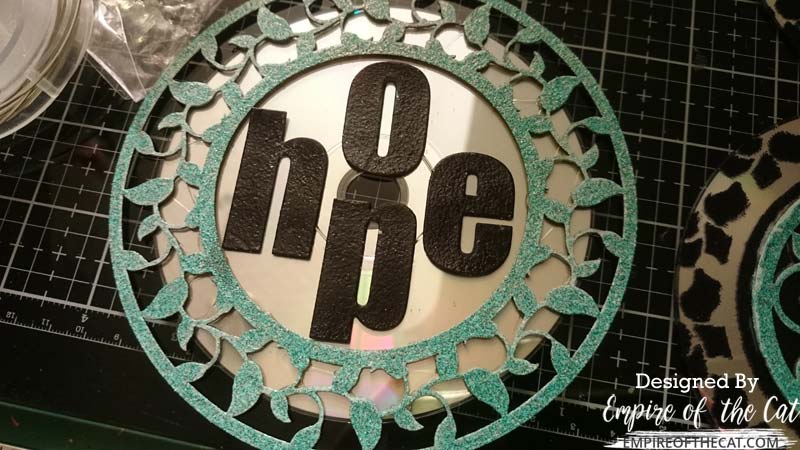
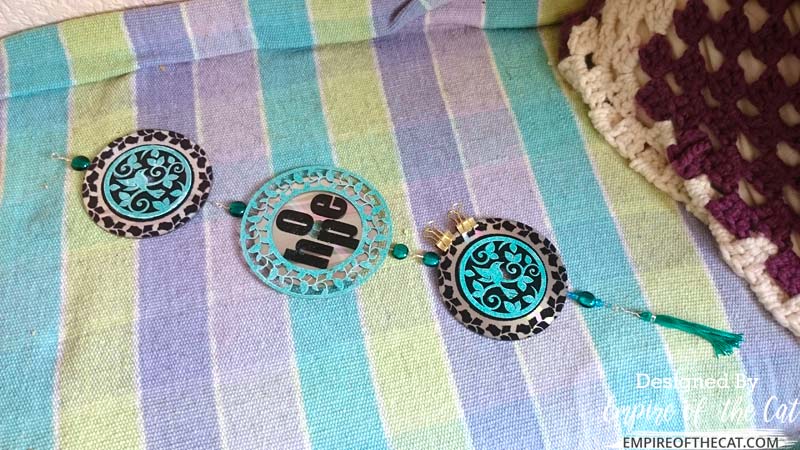
So now I have two CDs with hummingbirds in the centre, and one CD with the leafy frame but nothing to put in the centre of it, so I started to think of words that could maybe fit in that space, that I could die cut and embossed. I chose HOPE as I think we could all use a bit more of that at the moment. I also starting thinking about how I wanted to attach them to each other. I used this very strong Gutermann fabric glue to glue the chipboards to the CDs. It’s a glue I use a lot for gluing things to fabric, including metal hardware, so I knew it would definitely be able to glue chipboard and cardboard to metal no worries. I glued everything in place and put something heavy on them to hold them down while they dried. I use these Jeweller’s anvils since they are very small and deceptively heavy for their size and I have them because I make jewellery, but use anything you have that had has some weight – acrylic blocks are also good for this. As you can see I am using a big acrylic block with the anvils LOL

Once all the chipboards were glued in place, I then glued the black letters in the centre of the circle frame. I also pulled out a few more things from my stash in readiness!

The embossing powder I used on the chipboards is called Sea of Tranquility and it’s a beautiful turquoise colour and contrasts well with the Black Glint. This gives a black shiny background for the bird. Now I could have just covered the whole centre of the CD with black and not worried about the stencilling but at that point I wasn’t sure where I was going with this idea and I was stencilling with the circle frame anyway.

The HOPE letters are die cut using Altenew Bold Alpha dies to cut them out of cardboard and then I heat embossed them with the same Black Glint embossing powder as before.
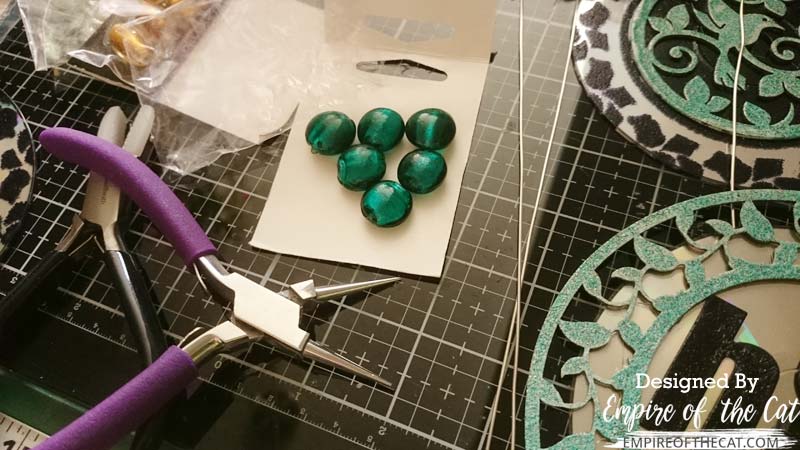
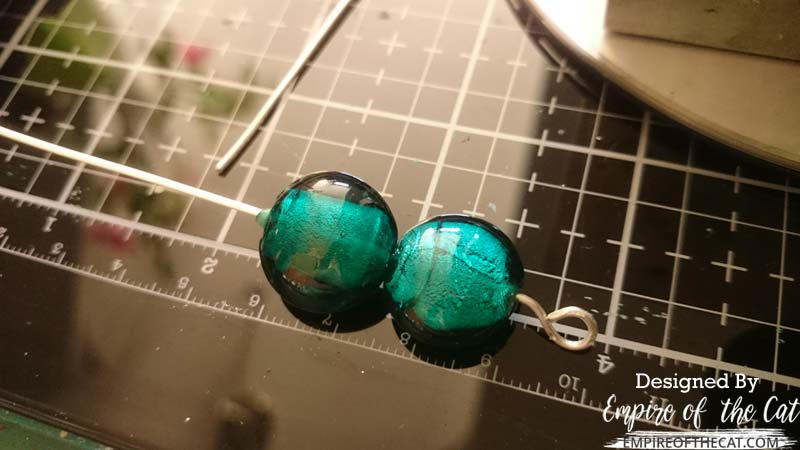
Now that everything was glued in place it was time to attach the CDs to each other to make the suncatcher. There are different ways of doing this, and I will give you some options at the end, but here’s what I did with mine. I cut three pieces of 18 ga wire that each measured eight inches long. I used my pliers to make an eye hook at one end of the wire and then threaded one of these green lampworked coin beads on to it.
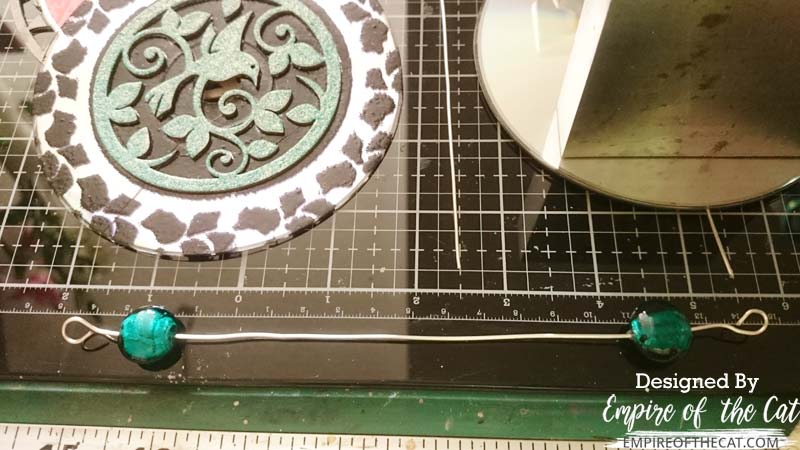
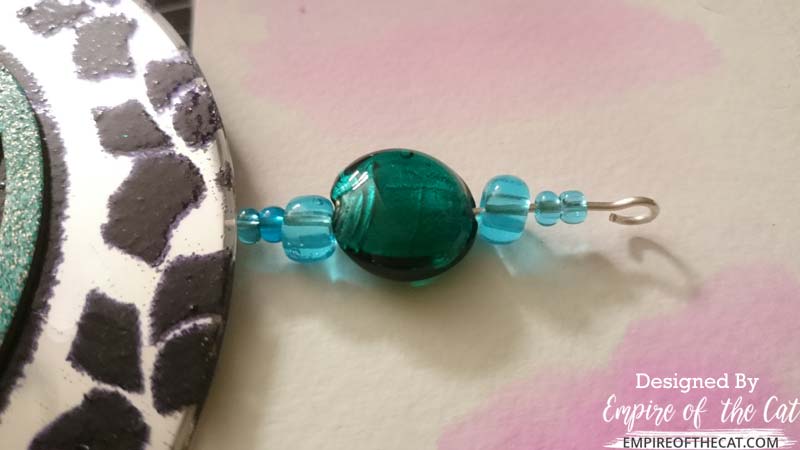
 Now because I wanted the back of the suncatcher to also be shiny, I decided to glue another CD onto the back, shiny side out. This achieved a couple of things – having shiny on both sides and enclosing the wire that runs from top to bottom of the CD. On the right of the photo below, you can see the wire sandwiched between two CDs and held down by one of the anvils. The wire across the bottom of the photo, with the two green beads, is just my test wire to make sure the wire was long enough to fit two beads on either side of the CD that has the frame on it as it is bigger than the other two CDs because of the frame!
Here’s a look at the front and back of the bird medallion pieces.
Here’s a closer look at the beads and the eye hook shape made on the end of the wire.
To make sure everything was glued down securely, I used binder clips to hold everything in place and left them overnight.

So at this point, we have two bird CDs with an eye hook and bead at the top and the straight end of the wire sticking out the bottom, and we have one HOPE leafy frame CD with an eye hook and bead at the top and bottom. Now it’s time to put it all together! Using pliers open the the eye hook on what will be the top bird medallion CD by turning it sideways. This ensures the integrity of the hook shape and allows it to be easily closed again. Hook the top eye hook from the centre CD through the open eye hook and then close it using pliers. Repeat this process with the bottom hook on the centre CD with the top hook on the bottom CD, which will attach all three CDs together.

On the bottom CD I decided to make it a bit more fancy since there was space to add more beads.
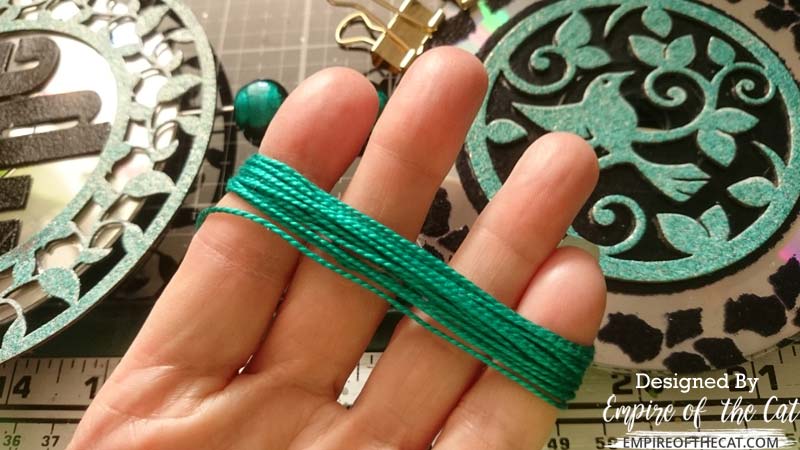
One idea usually leads to another so I decided to add a tassle to the bottom. This might prove too tempting for the kittens but fingers crossed they will leave it alone! I pulled out some likely candidates to make the tassel and since I had added the green beads, I opted for the green perle cotton on the right of the photo.
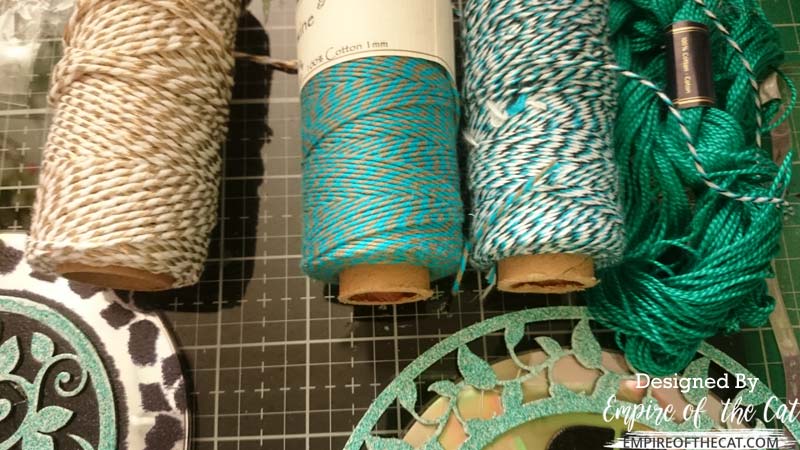
The tassel is very easy and is made by wrapping some of the thread around your hand or around an object that is the length that you want the tassel to be.
I wrapped some thin, 22ga silver wire around mine to secure it and also to provide a hook to attach it to the hook at the end of the CD, but you could also secure it by wrapping and tying some of the same thread around it.
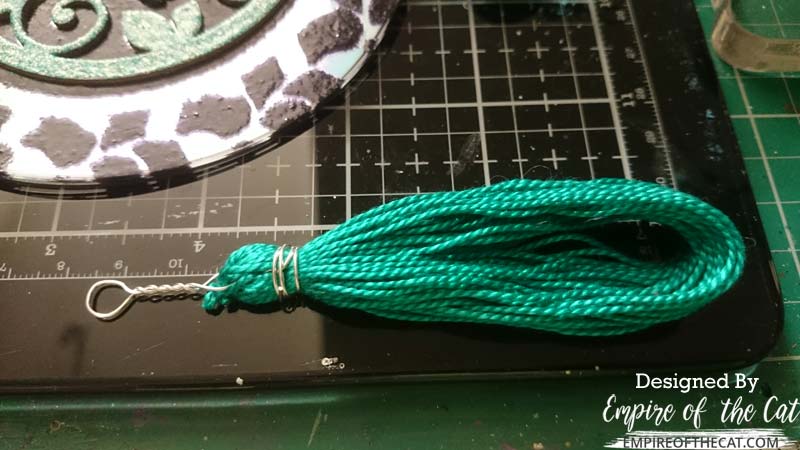
When you are happy with your tassel, cut through the bottom of the loop to make the tassel.
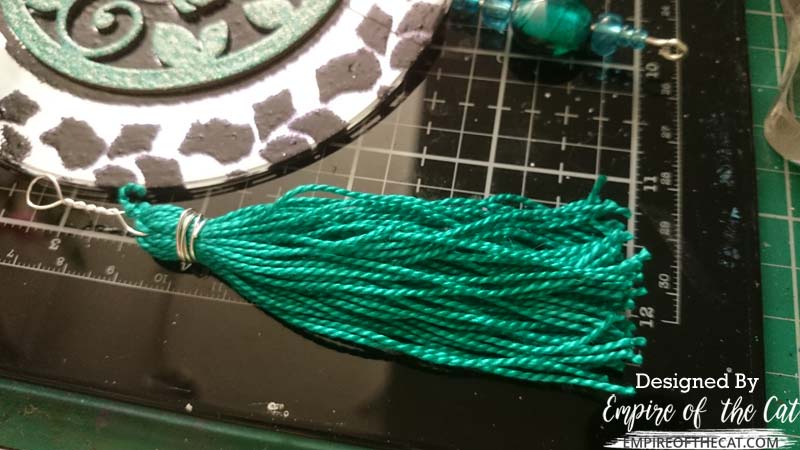
Attach the tassel to the bottom hook on the CD, in the same way as before and the suncatcher is complete!
Now it’s time to hang it up and see if we can attract some sunshine!


Thoughts
I love it when a project comes together organically with decisions being made on the fly rather than being planned in advance. I love it even more when everything I need can be found in my stash!
A couple of options – I like the holes in the middle and the shiny on both sides which is why I added a second CD to the backs (plus it helps secure and hide the wire!) but if you didn’t want the hole to show, you could put some silver card over the hole. If you didn’t want to add a second CD to the back, you could just paint the back or to hide the wire, you could cover the back with pattern paper. If you don’t have wire or pliers, you could use whatever you have in your stash. This could be yarn, thread, embroidery floss, baker’s twine, regular string, or even left over Christmas ribbon! Any of these options would do perfectly well for this project. If you don’t fancy heat embossing CDs, you could paint them instead. If you don’t have multiple CDs to choose from, you could make a smaller project using just one CD. Don’t have any CDs? You could cut a circle from mirror cardstock.
Thanks for making it all the way to the end. Let me know what you think in the comments!

Challenges:
Project Recipe:
Leafy Circle Frame D118A and the Hummingbird Medallion D117M
Wow Embossing ink and embossing powders – Black Glint, Sea of Tranquility
Gutermann HT2 glue
Altenew Bold Alpha dies
From the stash: old CD-ROMS, 18ga and 22ga wire, lampwork coin beads, other small beads, perle cotton
I started something new for April during lockdown and decided to continue:
Since we are all stuck inside and can’t leave the house, I thought I would try and do two things:
1. use this time to finish any unfinished projects
2. use as much recycled materials as possible (I do this a lot anyway) but also not to buy new stuff!
So, with that in mind, I will note the above on any posts, if applicable.
UNFINISHED PROJECT – NO
RECYCLED MATERIALS – YES – CDs, lots of stash items, nothing new purchased


Thanks for visiting today. Your comment is really appreciated.